Utility Knife (adult use only)
4 ft to 8 ft straight edge
Tape Measure
Ruler
Caulking Gun
Screw driver (preferably powered)
Scissors
Large working area
1. For pink foam insulation - measure 3 ½ inches and using utility knife (adults only!) and straight edge cut 3 8-ft pieces
of foam (finished pieces will be 8 ft x 3 ½ in.) (or use a sharp electric knife or band saw)
2. Cut one of these 8 ft pieces into two 45 inch long pieces (finished pieces will be 45 in. x 3 ½ in.)
3. Applyadhesivetoflattest1½”sideofone of the remaining 8 ft pink foam pieces and adhere it to the 8 ft side of the
rigid foam board with the1½”edgeinlinewiththeoutsideedge of the rigid foam. Repeat for parallel side.
4. Applyadhesivetoflattest1½“sideof45”pieceofpinkfoamandplace between the two 8 ft pieces of foam on one
end of the rigid board. Keep all these side pieces perpendicular to the rigid foam board. Repeat for other end of rigid
board.
5. Putrigidfoamboardonedgeandscrewineight2”drywallscrewsperside piece from under the board (see diagram)
andfourscrewsalongthe45”endpieces.Place2drywallscrewsper45”sidepiecethrough8ftsidepieces– see
diagram
6. Allow to adhesive to dry 15 –20 minutes.
7. Using1”drywallscrews,attachcornerbracestoalloutside corners.
8. Find center of rigid board at 4 ft mark. Using utility knife, score 8 ft board in half from the top side, leaving the foil
covering intact on bottom, then cut completely through 8 ft x 3 ½ in. side pieces at same point. Bend table back to
break the score lines. Table will fold in half with bottoms together. Reinforce by adding 4 ft strip of duct tape to this
“hinge”.
9. Using black contact paper (or duct tape), cover pink sides – important: do not wrap the contact paper or black
duct tape around the ends of the pink sides at the hinge – thetablewon’tcometogether– see photo page –
“Top View of Fold” to see what the side pieces should look like at the hinge.
10. Voila – a lightweight, fairly durable (but handle carefully – it’sstillfoam!),“stowable”,portable,FLLcompetitiontable!!
11. Contact us – The Inventioneers – at TheInvent[email protected] to tell us you used our design and let us know
how it works for you.
THE TEN POUND HOME PRACTICE TABLE FOR FLL TEAMS
Quantity
Product
1
1.5x2x8 Foam Insulation (pink)
$11.36
1
11/2 x4x8 Sheet Rigid Foam Insulation Board
$23.45
4 ft
duct tape
$ .50
4 (1 pkg)
3”cornerbraces
$ 3.97
8
1”drywallscrews
$ .90
1 tube
Insulation adhesive
$ 3.44
1 roll
Black co
ntact paper
(or black duct tape)
$ 6.48
Total for Materials:
$56.04
24
2”drywallscrews
$ 5.94
2009 prices
Best tip: Check with your local Home Depot to see if they will cut the foam pieces for you. You can offer to list them as an in-kind sponsor
– while you are mentioning sponsorship, ask for a materials donation!
Please refer to Photos Page as you build your table

ADDITIONAL INSTRUCTIONS
More tips from the Inventioneers
We still have the first STOW-or-GO table we built over 2 years ago and it is still in good
shape with heavy use and being dragged all around the country! Leaning on the table
with your hand will not cause any problems if the table is up on saw horses or a table. If
the table is on the floor, heavy leaning with hands or knees might cause indentations.
These are not as much of an obstacle as bumps would be. Remember, plywood tables
will have knots and irregularities that might affect your robot at tournaments - the team
should try to design a robot that will not be affected by minor table surface differences!
The STOW-or-GO table was designed primarily for teams that have space issues and
must take the table down in between meetings or teams that will be meeting at different
locations. If you feel your use will be heavy (not just normal take down and set up but
travel and rough handling), let us know and we can give you some tips for the heavy-use
table.
The only warning to speak of is that kneeling or leaning heavily on the table top (see
above), or dropping sharp objects on it with force may create pock marks which we find
are easily fixed with a piece of duct tape. As far as recommendations go, we encourage
people to approach their local Home Depot store to see if they will cut the foam walls
(including cutting the 8 foot sides in half). Our Home Depot (Londonderry, NH) contact
said he was going to use a band saw. If Home Depot cuts the foam wall pieces, the
only job left that requires a utility knife is the scoring of the rigid foam sheet for folding.
The other thing to note is when applying the contact paper (you can also use black duct
tape, though it is pretty thick) to the walls, don't fold it into the split in the walls on the
long sides - the table won't open all the way flat. We put the contact paper on with the
table open and use one continuous piece of contact paper on the long sides. Then we
slice the paper at the split so there isn't any extra paper to fold in. We finish off any
outside corners like wrapping a present.
Please refer to the Photos page while you are building your table.
When setting up the table for first use after building or storage, just make sure that the
two halves line up properly so they mesh at the split so there is no ridge in the middle of
the table. Also, no smoking should be allowed around the table.
We are so happy to share our design which we have tested for over 2 years. We only
ask that you credit our team, The Inventioneers, to anyone who asks about your table.
THE TEN POUND HOME PRACTICE TABLE FOR FLL TEAMS
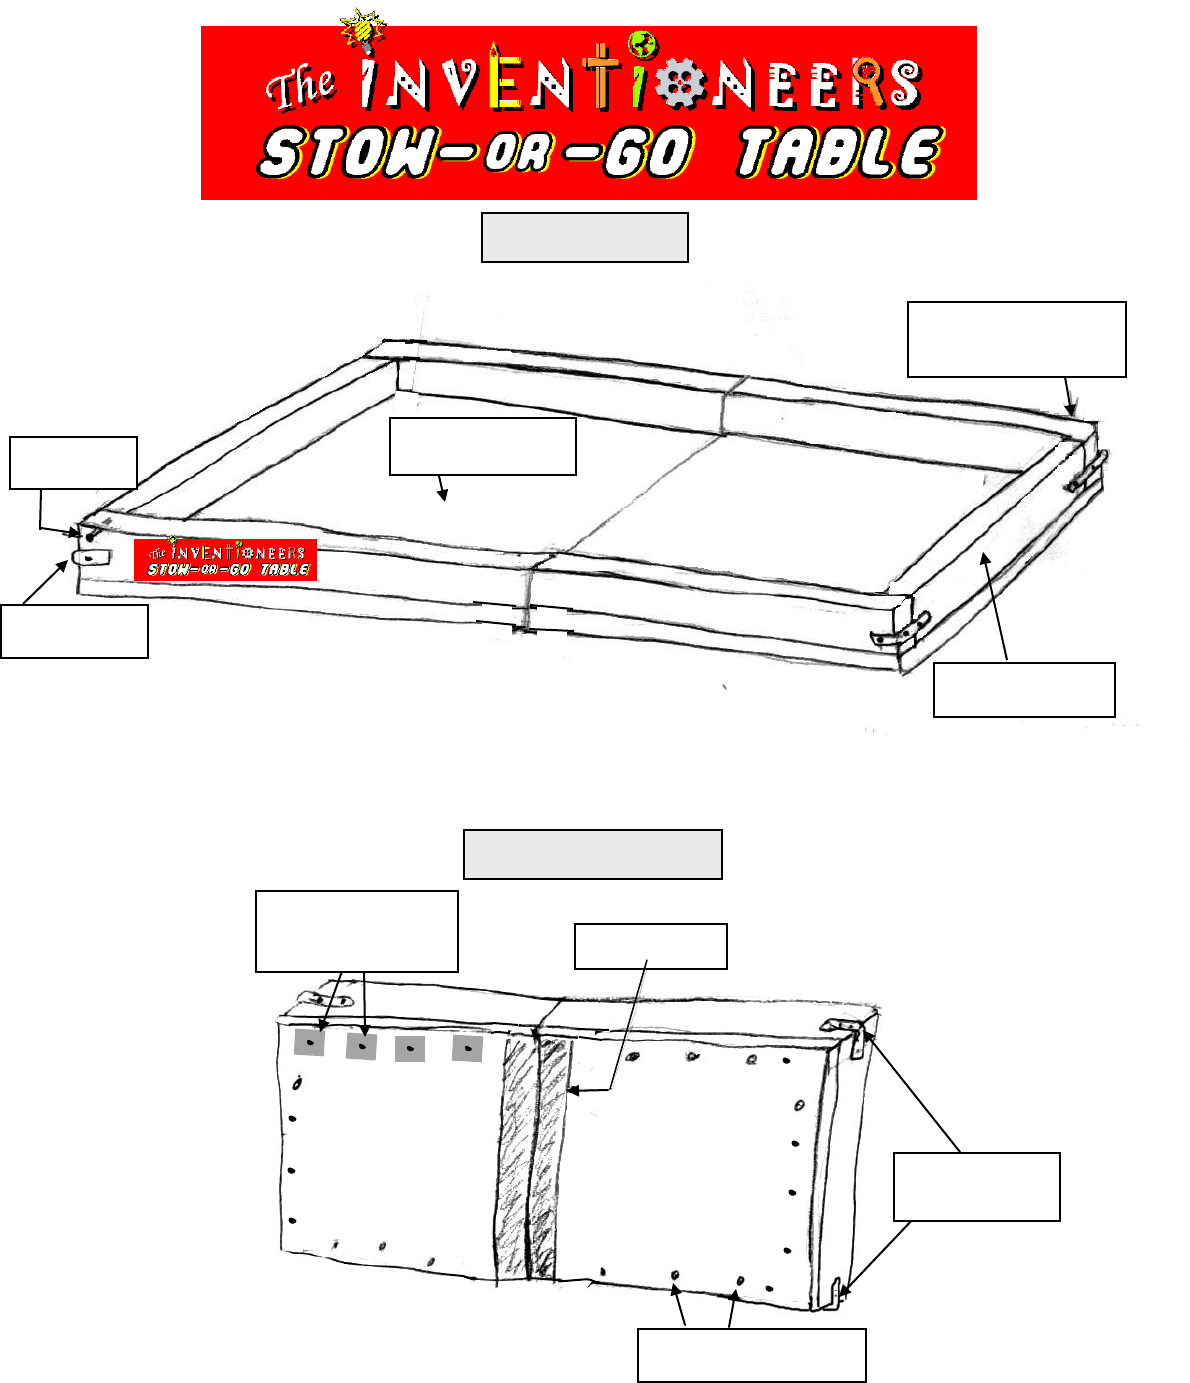
1” Drywall
screws
2 per corner
8 ft x 3.5 in x 1.5 in
foam insulation
(from one 8 ft x 2 ft piece)
45 in x 3.5 in x 1.5 in
foam insulation
Duct Tape Hinge
2“ Drywall screws
12 per half of rigid insulation
TOP VIEW
BOTTOM VIEW
L-Brackets
(4 needed in all)
L-Brackets
(4 needed in all)
8 ft. x 4 ft x 1 in
Rigid Foam Insulation
Duct Tape Reinforcements
under all screw heads to keep
them from pulling through
foam board (optional)
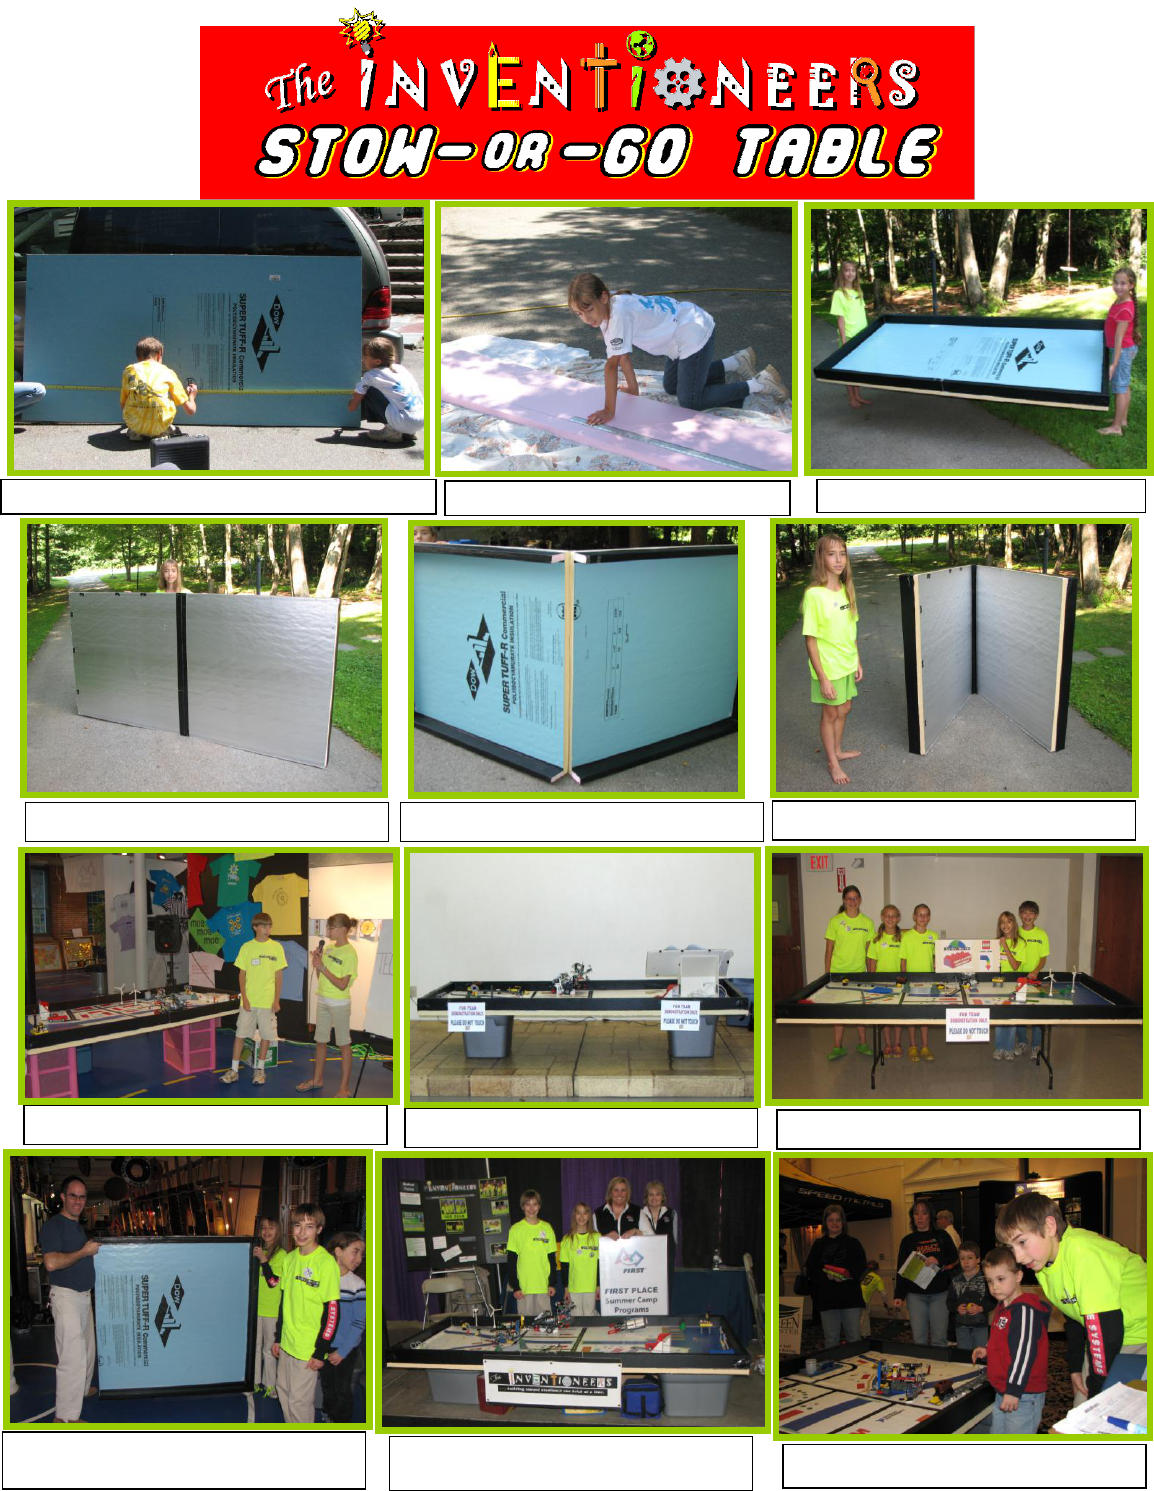
Building the STOW-or-GO measuring top for scoring
The finished table- bottom view
Finished table- top view
The finished table- top view of fold
The finished table- bottom view of fold
Measuring to cut foam side pieces
With Scott Evans,
FIRST Global Game Designer
With Nancy Lane and Dana Chism,
FIRST Place Managers
At Parenting NH Summer Camp Expo
At the ABCs of FLL Workshop 8/26/09
At SEE Science Center
At Leach Library, Londonderry
